Updated: 3/30/2026
This is a continuation from Part One where we learned the basics of composting. There are a lot of different ways one can compost so in this article we have rounded up 12 of the most common and uncommon (but really cool and regenerative) ways to compost. Before we get into our comparison, a few general notes:
This guide is meant to provide a high-level overview and is not an exhaustive resource. You will probably want to do more research once you find a method that you think will work for you. In compiling this list we tried to approach this project in a way that is accessible to beginners. We have also provided some links to examples and videos on how to DIY each method where applicable. These videos and examples are not endorsements and may not be the best ideas out there, but they are there for you to begin your research. This list is not in any particular order.
The costs and timeframes listed are estimates. Buying new materials or ready-made products (listed in the cost section) is always going to be more expensive than salvaging or repurposing materials and building them yourself. Don’t let the cost be a barrier for you! In some cases the materials needed can vary widely so make sure to do your own research if building something. The DIY scale is from 1-3 (easy, medium, hard – in terms of garden projects). For comparison, building a house would be a 10+ on this scale! The build time does not include acquiring all of the parts since that takes a variable amount of time. Also, the materials list does not include any tools needed or the actual organic matter you need for a 20-30:1 ratio as this is necessary for almost all of the methods listed. The exceptions are the countertop “composter” and the biogas digester.
Remember that the more you do it, the more you will learn what works and what doesn’t. God designed the microorganisms to “want” to break things down, so if we simply provide the right environment for them they will take care of the rest! The same principle applies to gardening in general and the Lord makes it clear that He mysteriously causes things to grow, not us.
And he said, “The kingdom of God is as if a man should scatter seed upon the ground, and should sleep and rise night and day, and the seed should sprout and grow, he knows not how. The earth produces of itself, first the blade, then the ear, then the full grain in the ear. But when the grain is ripe, at once he puts in the sickle, because the harvest has come.”
Mark 4:26-29
Let’s jump in to the comparison!
1. “Yard” Composters/Tumblers
Probably one of the most familiar ways of composting for homeowners, these devices are typically black-colored in order to be kept hot by the sun. Some are even insulated. They make a small amount of compost at a time and some designs tumble in order to stay aerated.
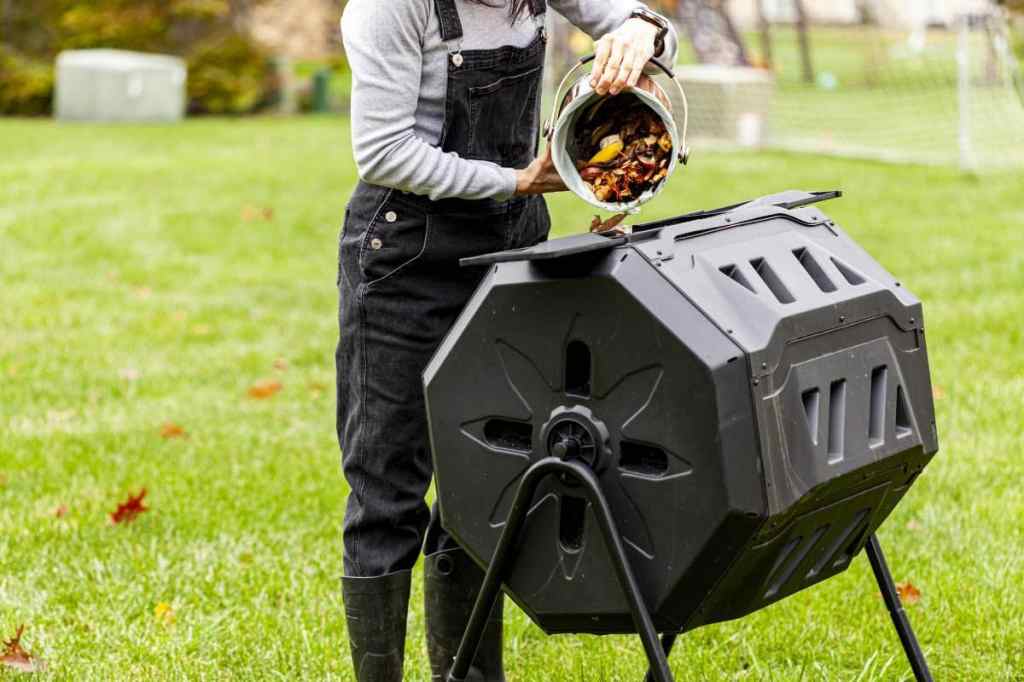
- PROS: Small footprint. Nicely contained. Aesthetically pleasing (typically).
- CONS: Only makes small batches.
- MATERIALS NEEDED: You can make these out of virtually any plastic container, scrap pieces of wood such as 2x4s, and other inexpensive hardware and screws.
- BUILD TIME: 2-4 hours
- DIY SCALE: 2
- TIME TO USABLE COMPOST: 4-6 weeks
- HANDS-ON HOURS PER WEEK: 1 hour
- COST (new): $80-150
- Here is a “how-to” video and here is an example product
2. Trench/Pit Composting
This method involves digging a trench or pit/hole, simply dropping organic matter into it, and covering it back up again with soil to allow the microorganisms in the soil to break it down.
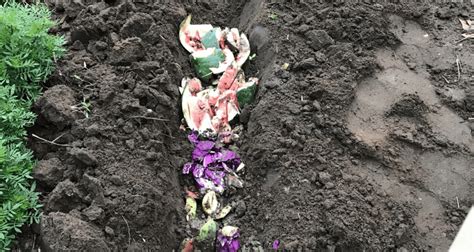
- PROS: Low maintenance. Can prevent evaporative water loss. Requires nothing more than a shovel. Good for new beds.
- CONS: Requires digging which disturbs the soil and the fungal populations. Only benefits that one spot in the garden. Depending on the timing of your planting you may have to wait to do this.
- MATERIALS NEEDED: A shovel and a spot in the garden
- BUILD TIME: Depends on the size of the hole and how fast you dig
- DIY SCALE: 1
- TIME TO USABLE COMPOST: 6+ weeks until the organic matter breaks down depending on what you put in there
- HANDS-ON HOURS PER WEEK: None except the week you choose to dig
- COST (new): $0 unless you need to buy a shovel
3. Sheet Composting
Technically this can happen underground but it is most commonly done above the surface where a “sheet” or layer of cardboard sits on the surface of your garden area and is followed by other “sheets” or layers of organic matter (like a lasagna), moistened, and allowed to compost in place.
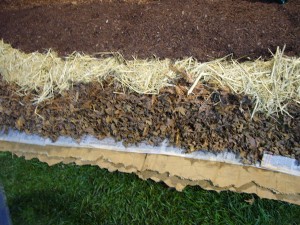
- PROS: Low maintenance. Great for building new garden beds. Uses waste stream materials (paper and cardboard) to suppress weed growth. Does not disturb the underlying soil microbial life.
- CONS: Stays only in the one place you started it.
- MATERIALS NEEDED: Cardboard, mulch
- BUILD TIME: Totally depends on the size
- DIY SCALE: 1
- TIME TO USABLE COMPOST: It’s not so much usable compost as it is a usable garden bed but it can be planted in immediately if necessary although the organic matter breaks down in about 6+ weeks before you get any sort of composting benefit.
- HANDS-ON HOURS PER WEEK: None except the week you choose to build it
- COST (new): $0 if you use free cardboard
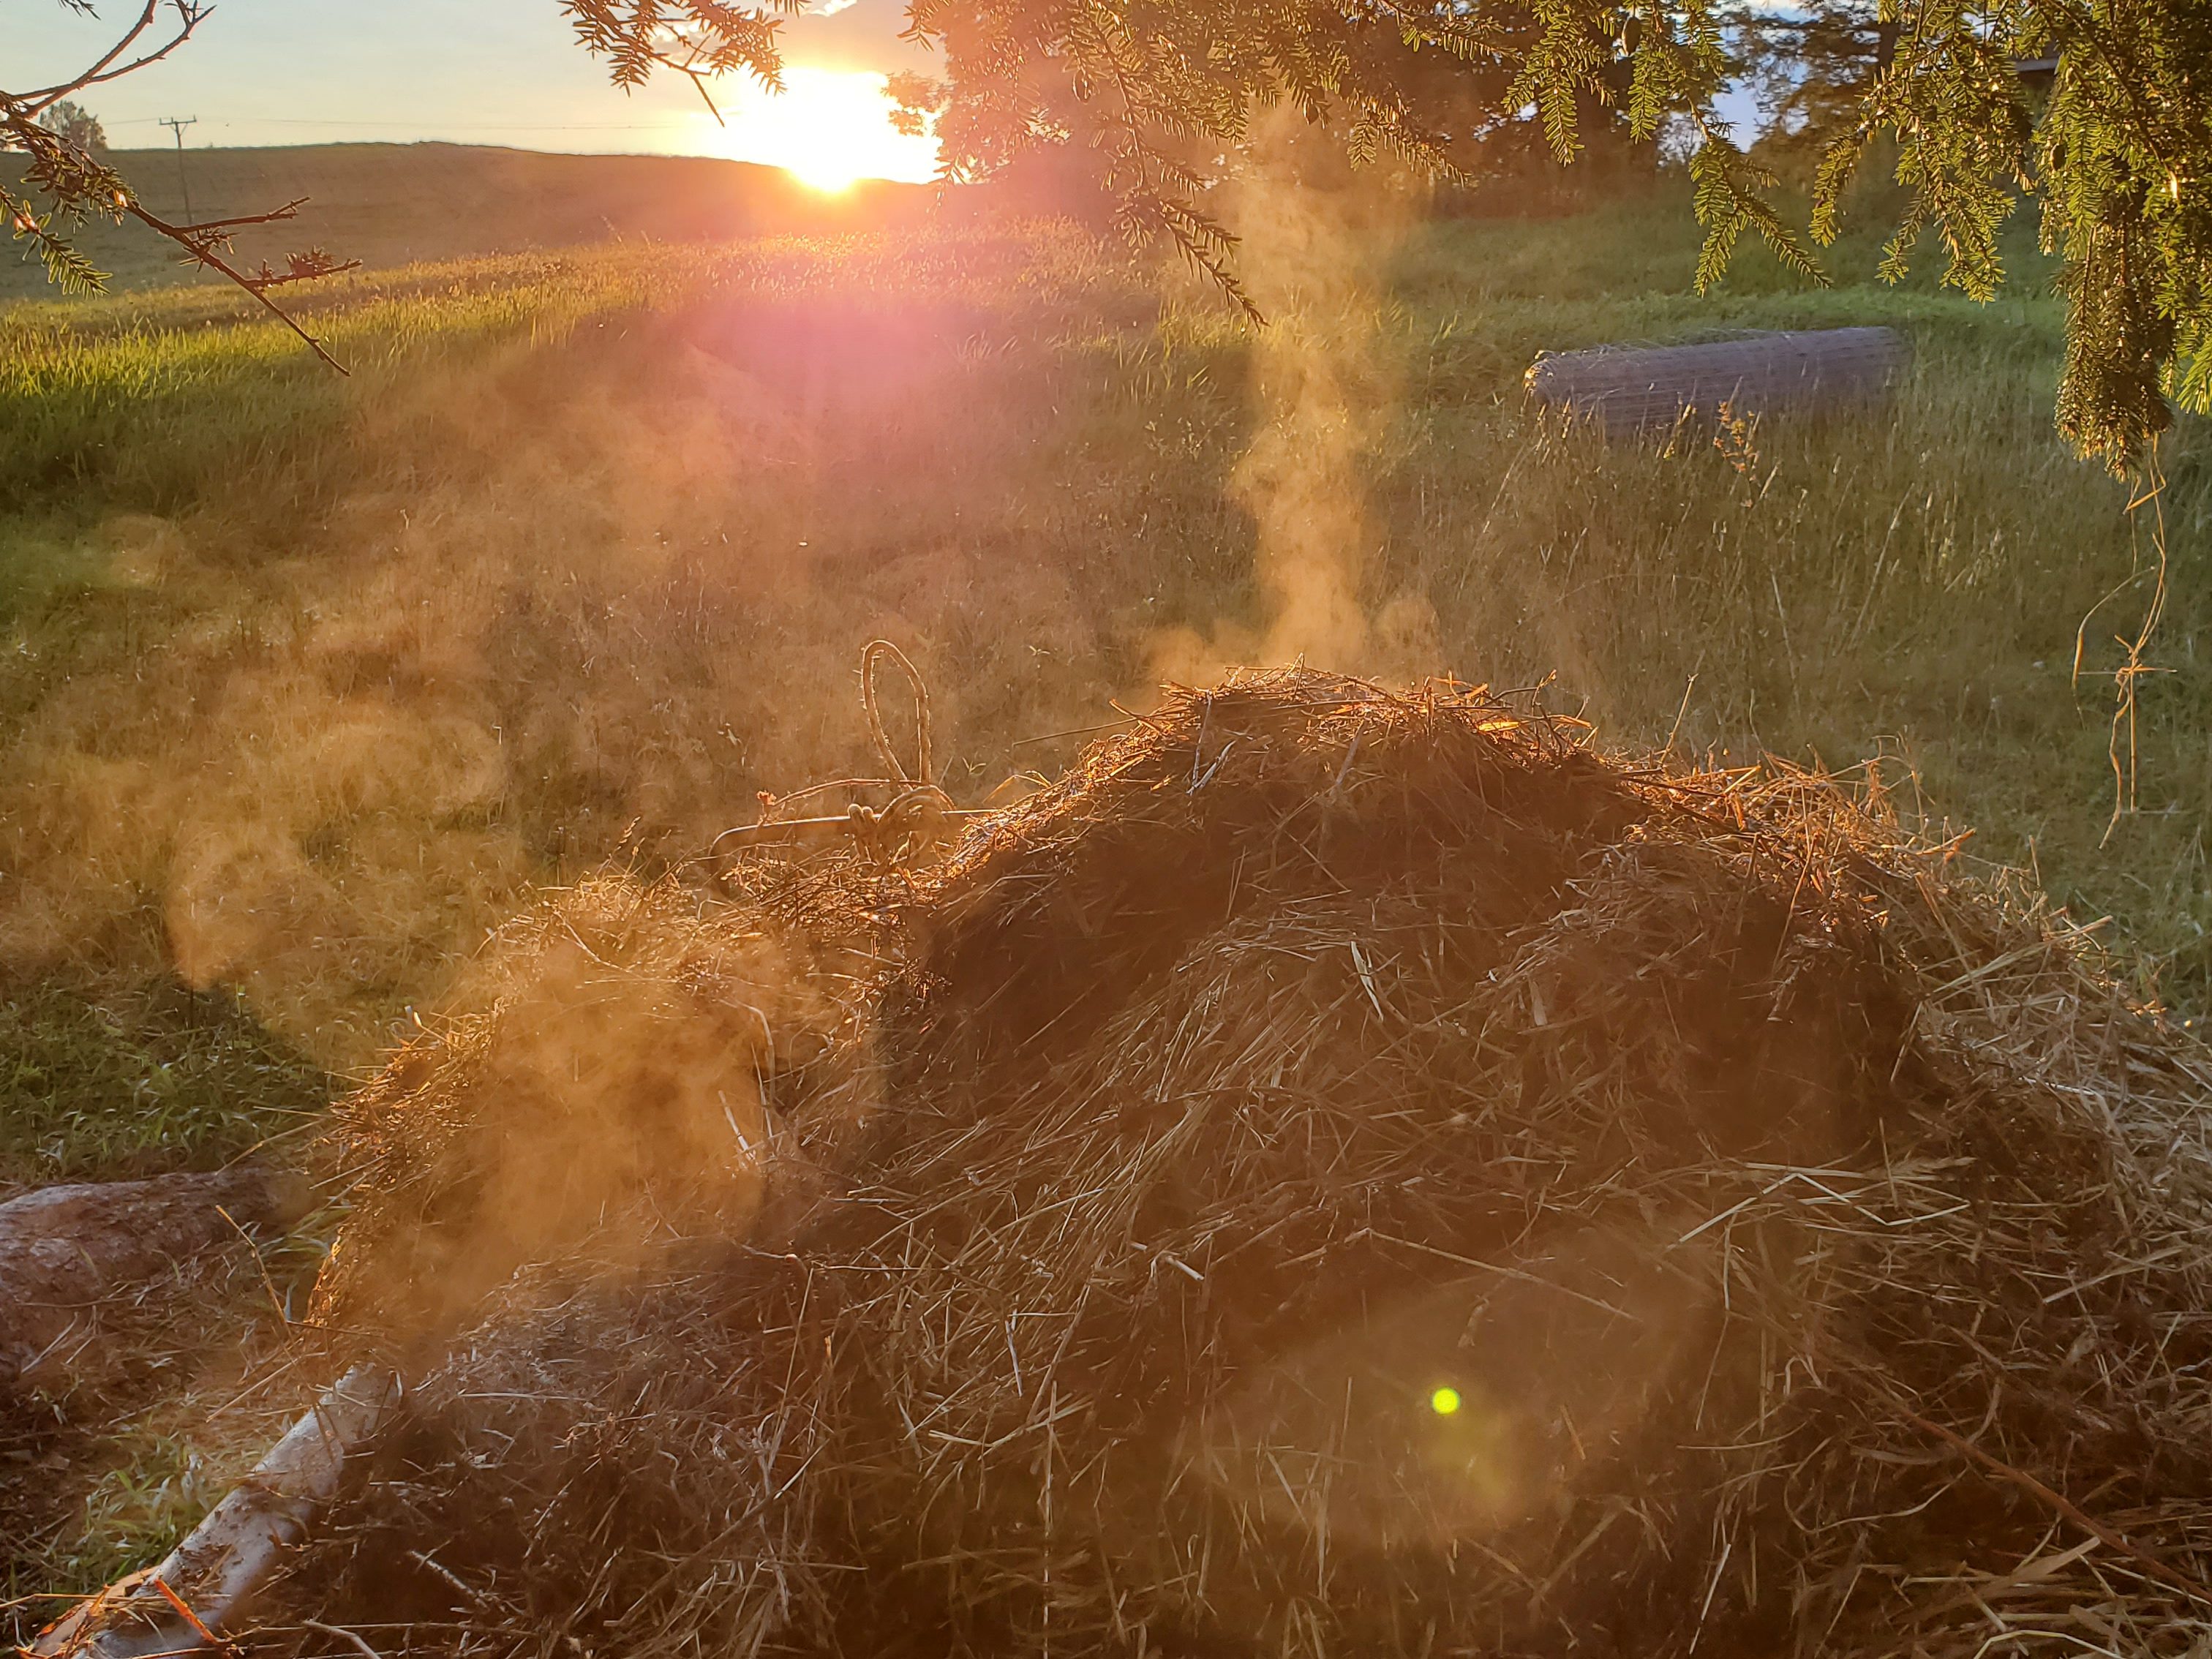
4. Hot Composting
Sometimes also called “quick composting” this is one of the fastest ways to breakdown organic matter since air is constantly being introduced into the system to speed up the aerobic decomposition. It typically requires someone to turn over at least one cubic yard of material every day or so.
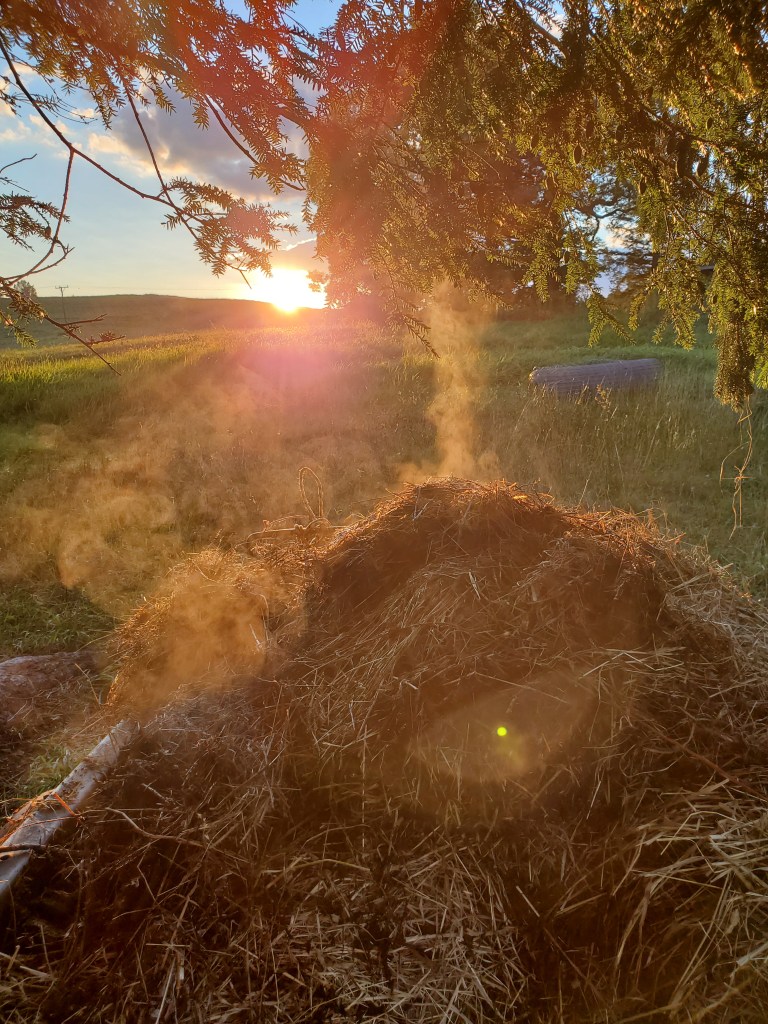
- PROS: Compost can be made very quickly. Pretty much any organic matter can be composted. Loses almost no volume in the decomposition process. Does not require building anything if you don’t want to.
- CONS: Typically need at least one cubic yard of material or insulation. Typically requires a lot of turning or using a compost aerator. Some odor produced during the process. Frequently actively aerating the compost reduces the fungal microbial populations.
- MATERIALS NEEDED: Minimum of one cubic yard organic matter to generate enough heat to keep the microorganisms active, or else some form or insulation, a shovel or pitchfork. There are a variety of materials you can use such as t-posts and wire fencing, pallets, wood boards, screws, a tarp, etc. if you plan on building a structure for the compost.
- BUILD TIME: 1-8 hours depending on how involved you make your structure if building one.
- DIY SCALE: 1
- TIME TO USABLE COMPOST: 3 weeks
- HANDS-ON HOURS PER WEEK: 7 Hours
- COST (new): $50-100 if you plan to build something otherwise $0
- Here and here are 2 good “how-to” videos
5. Cold Composting
This is probably the most common composting method since it requires very little effort. Also called “lazy” composting, you basically “set and forget” the organic matter and let it break down undisturbed. It typically takes a long time and the pile can be added to and built up slowly over time rather than needing all of the material at the beginning.
- PROS: Very low maintenance. Requires less start up materials and can be added to slowly all the time. Does not require building anything if you don’t want to.
- CONS: Very slow. It is recommended to not add animal-based inputs such as meat and dairy unless buried very deep in the pile and you are willing to wait at least a year before using the compost. Loses a good amount of volume through evaporation and emission of carbon dioxide. Harvest requires separating apart the pile to get to the finished compost on the bottom.
- MATERIALS NEEDED: There are a variety of materials you can use such as t-posts and wire fencing, pallets, wood boards, screws, a tarp, etc. if you plan on building a structure for the compost, otherwise nothing.
- BUILD TIME: 1-8 hours depending on how involved you make your structure if building one.
- DIY SCALE: 1
- TIME TO USABLE COMPOST: 3-12 months
- HANDS-ON HOURS PER WEEK: 1
- COST (new): $50-100 if you plan to build something otherwise $0
6. Johnson-Su Bioreactor
A variant form of hot composting that involves creating air holes in the compost pile using PVC pipes or hardware cloth to ensure there is a constant supply of air flowing in to the pile. This design, invented by Dr. Johnson and his wife Hui-Chun Su, uses passive aeration which results in a slower time that true hot composting but it is still much faster than slow composting.
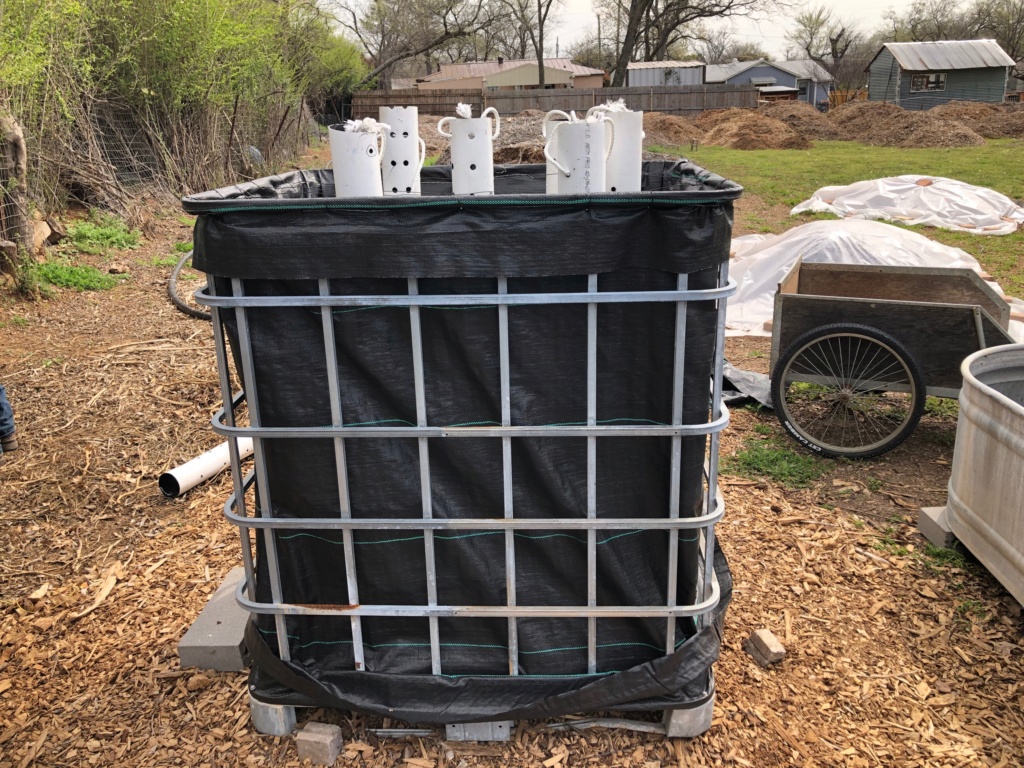
- PROS: Faster than cold composting and requires no turning. Allows more fungi to thrive since there is less agitation. Reduces salinity of final product.
- CONS: Requires more upfront work than hot or cold composting. Slower than hot composting. Requires at least 1 cubic yard of material. No real way to buy this pre-made which means it must be built from scratch.
- MATERIALS NEEDED: PVC pipes or hardware cloth, IBC tote cage or concrete re-mesh and wire, landscape fabric or weed barrier, pallet if not using an IBC tote, re-bar (optional)
- BUILD TIME: 4-8 hours
- DIY SCALE: 2
- TIME TO USABLE COMPOST: 2-4 months
- HANDS-ON HOURS PER WEEK: 1
- COST (new): $75-500 for new materials depending on which design you choose
- Here and here are 2 good “how-to” videos
7. Bokashi Composting
Bokashi is a method of “composting” that originated in Japan. It differs from most other compost methods in that it uses bran grains inoculated with Lactobacillus bacteria (LAB) to perform anaerobic lacto-fermentation. This kick-starts the composting process but does not actually do any composting on its own. It’s actually preserving/pickling the organic matter that is layered with the bran grains. This is beneficial because the acidic environment produced reduces pathogens and allows for composting a bigger variety of inputs (such as meat and dairy). Once the organic matter is fermented, it can then be placed in a compost system or buried directly in the ground.
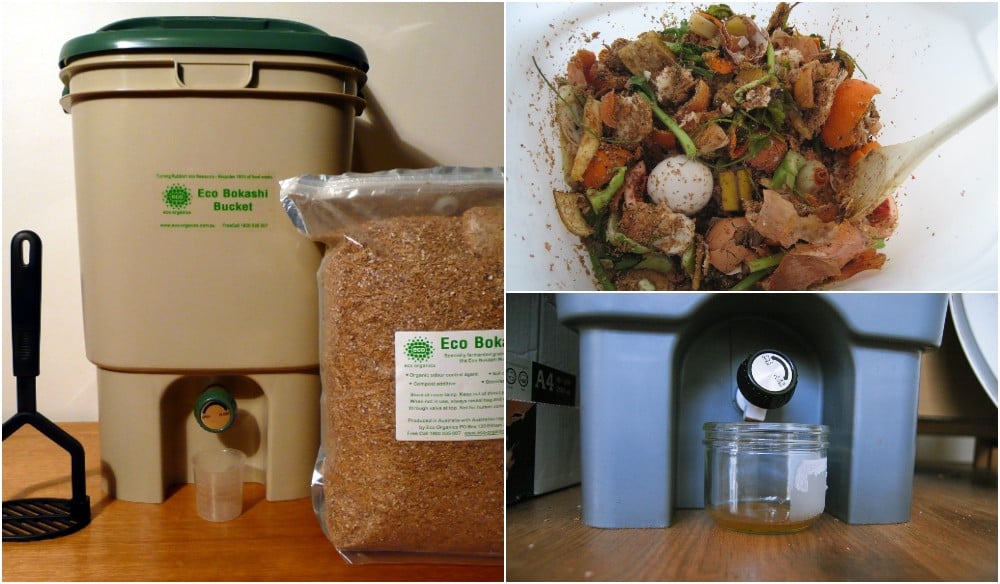
- PROS: The bran grains last a long time. Foul odors are reduced and even become sweet smelling despite the anaerobic conditions thanks to the LAB. It is a very clean setup for indoor use. Some harmful pathogens are neutralized due to the acidic anaerobic fermentation environment. Bokashi fermentation may help reduce methane off-gassing once the organic matter is added to a compost system.
- CONS: Requires you to buy bokashi bran grains or to ferment your own bran grains which is at least a two-step process instead of one. There is some question as to whether the benefits outweigh the extra step since this method is more of a preservation method than a composting method.
- MATERIALS NEEDED: Bokashi composter (can be purchased or easily made DIY), bran grains fermented with LAB
- BUILD TIME: 1-2 hours
- DIY SCALE: 1
- TIME TO USABLE COMPOST: 4-5 weeks
- HANDS-ON HOURS PER WEEK: 1
- COST (new): $75
- Here is a link to the product, and here and here are 2 good “how-to” videos
8. Vermicompost (worm composting)
This design uses Red Wiggler composting worms (also called Tiger worms) to consume organic matter. The compost is the “castings” or worm poop that is generated which is filled with beneficial microbes, beneficial binders to help aggregate soil particles, and nutrients. These castings are more worm digestate than true compost since they can still be composted further by microbes.
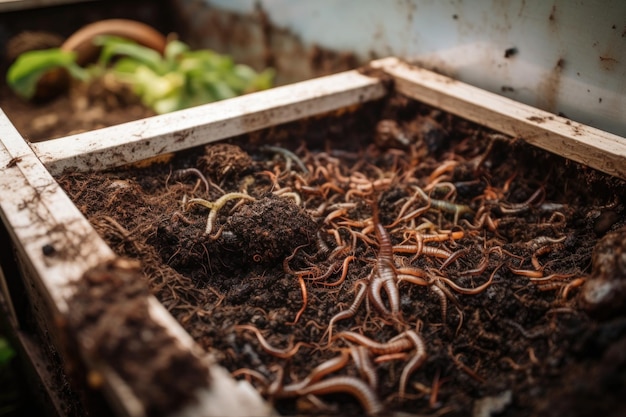
- PROS: Worm castings are considered “black gold” for the garden. They will not typically burn your garden (unless you go extremely overboard) since the nitrogen is in a slow-release form that becomes bio-available to plants slowly over time.
- CONS: Can attract ants, mites, or fruit flies if not properly designed or maintained. Worms are sensitive to too much of certain foods (fats such as meat, dairy and grease, citrus, alliums, certain spices, etc.). Worms can die if the proper temperature is not maintained (between 55 and 80 degrees Fahrenheit).
- MATERIALS NEEDED: a worm bin set up which can be purchased or easily made DIY, carbon-rich bedding material like shredded paper, cardboard, leaves, etc., red wiggler worms
- BUILD TIME: 1-2 hours
- DIY SCALE: 1
- TIME TO USABLE COMPOST: 1.5-4 months
- HANDS-ON HOURS PER WEEK: 1-2
- COST (new): $75-$150
- Here is an example product.
- There are several ways to vermicompost so here are four videos!
9. Black Soldier Fly Composting
This is a similar process to using worms, but instead uses Black Soldier Flies (BSF). The adults lay eggs and when the eggs hatch into larvae, the larvae eat the organic matter. Larvae can then be collected and fed to chickens or other animals (birds, reptiles, etc.). BSF should not be confused with house flies. They do not have mouth parts, look completely different (more like a wasp but without a stinger), are not a nuisance, do not spread disease, and actually generate a sweetish musky odor that repels houseflies.
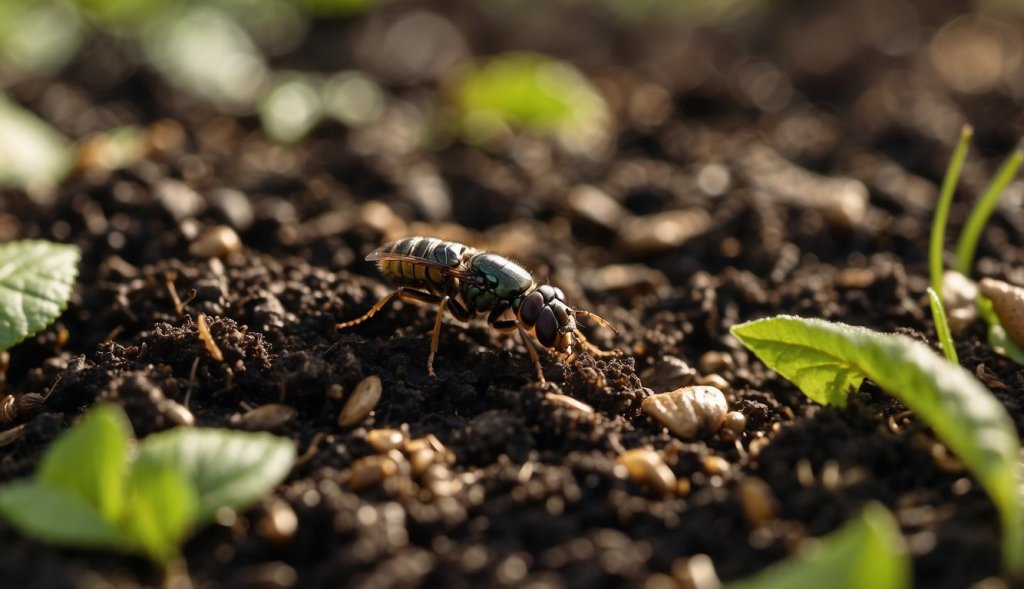
- PROS: BSF larvae convert food waste to digestate at a faster rate than worms making this a pretty quick way to generate smaller amounts of compost. Overall low maintenance once the initial setup is done.
- CONS: Most people think all flies are gross so this stigma may be hard to overcome. An initial colony of flies typically has to be purchased each season. Flies can die if the proper temperature is not maintained (between 60 and 85 degrees Fahrenheit).
- MATERIALS NEEDED: A BSF bin, bedding such as cardboard for the flies to lay eggs, BSF starter population
- BUILD TIME: 2-4 hours
- DIY SCALE: 1
- TIME TO USABLE COMPOST: 3-4 weeks
- HANDS-ON HOURS PER WEEK: 1-2
- COST (new): $160
- Here is an example of a product, and here and here are some good “How-to”/DIY videos
10. Chicken Composting
This design uses chickens to consume organic matter such as food scraps, weeds, etc. The chickens produce a nitrogen-rich manure “greens” into a carbon-rich bedding “browns” that decomposes into compost.
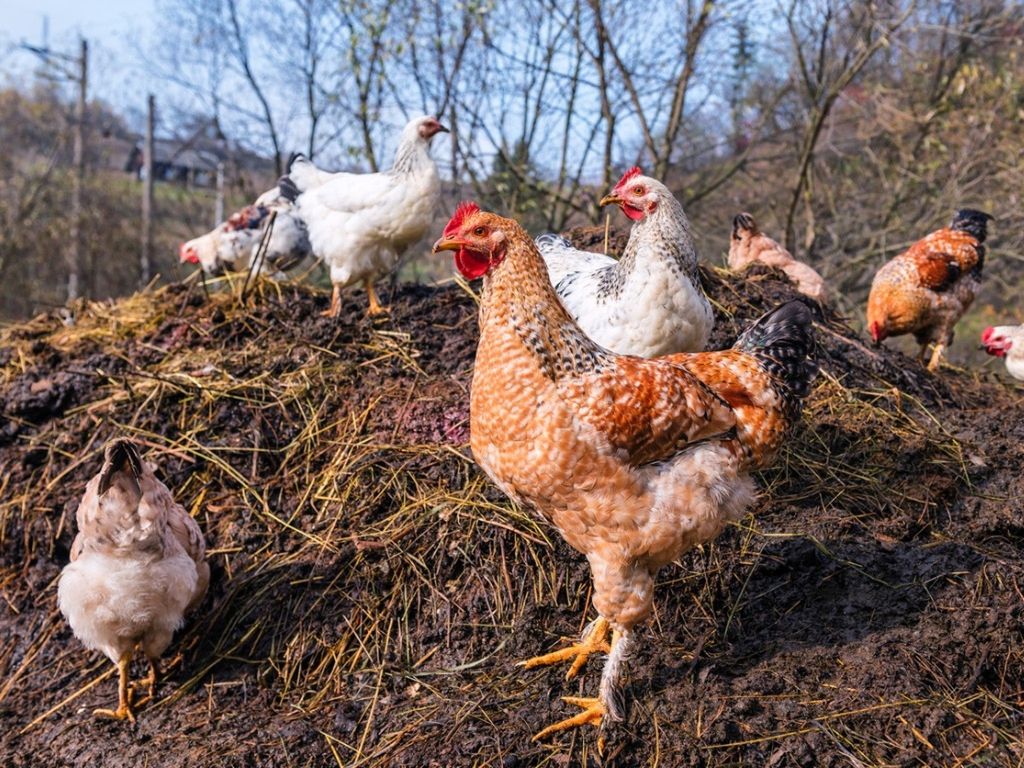
- PROS: You get all the benefits of chickens such as eggs, meat and entertainment. The compost is aerated naturally by the chickens scratching at it to consume insects and feed. This method provides a source of feed for the chickens and, with the right setup, can produce a lot of high-quality compost fairly quickly.
- CONS: If you don’t already have chickens, this system has an expensive up-front cost and requires ongoing maintenance. Even if you already have a coop you will likely need to re-design it to maximize your compost-making potential, especially in a cold climate.
- MATERIALS NEEDED: Chickens, a properly designed coop, carbon-rich bedding such as straw, wood chips, sawdust, wood shavings, etc., and everything you need to take care of the chickens: supplemental feed, grit, dust bath, etc.
- BUILD TIME: 4-40 hours
- DIY SCALE: 3+ (depends on the type of coop)
- TIME TO USABLE COMPOST: 5-6 weeks
- HANDS-ON HOURS PER WEEK: 7
- COST (new): $500+ depending on the coop and how many chickens
- Here is a link to a coop and run set-up, and here is a video for a DIY option
11. Biogas Digester
This is not technically a compost system but rather a great way to turn organic matter into other products good for the garden and homestead, A biogas digesters is an artificial “stomach” that anaerobically “digests” organic matter feedstock to produce nitrogen-rich fertilizer and, with the inoculation of methane-producing microbes, methane-rich “biogas”. You put in a certain amount each day to “feed” the digester and you get an equivalent volume of fertilizer out the other end. A 275 gallon IBC tote digester does well with about 5 gallons of feedstock per day (provides a 55 day retention period) and, if the feedstock is high-quality (meaning colorful, nitrogen-rich sources with complex protein structures such as vegetable scraps), it can produce up to 2 hours of cooking gas per day on a single burner stove. This size can be scaled up or down.
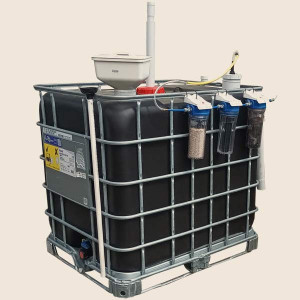
- PROS: Provides biogas which can be used for cooking or, if purified and designed correctly, can be used in any system that uses natural gas (methane). Can take any type of organic material that is not high in lignin (wood chips, sawdust, etc.) including “humanure”, meat, dairy, poisonous foods, etc. Provides a nutrient-rich fertilizer every time you add to it (i.e. daily). Materials are easy to come by all over the world.
- CONS: Bulky and not generally aesthetically pleasing. Needs a starter supply of fresh cow or horse manure for the methanogens. Needs to be fed each day to keep the methanogens thriving and slows down or stops in the winter in cold climates unless in a heated space. The effluent fertilizer may need to be composted afterwards depending on the use and what went into it.
- MATERIALS NEEDED: A container capable of being sealed off from the air (this can be a 5 gallon bucket all the way up to an IBC tote or beyond), plumbing parts such as PVC pipes, bulkhead/uniseal fittings, etc., a starting culture of methanogens (methane-producing archaea microbes) such as cow or horse manure to inoculate the digester, water
- BUILD TIME: 2-4 hours
- DIY SCALE: 2
- TIME TO USABLE COMPOST: 4-8 weeks depending on temperature
- HANDS-ON HOURS PER WEEK: 1
- COST (new): $750
- Here is a link to the product, and here is an example DIY video
12. Countertop Kitchen “Composter”
This is an electric device that uses heat and grinder blades to quickly break down and separate food scraps into a granular form. It does not actually compost food since there is no microbiological activity. We included it on this list because it is often advertised as a composter.
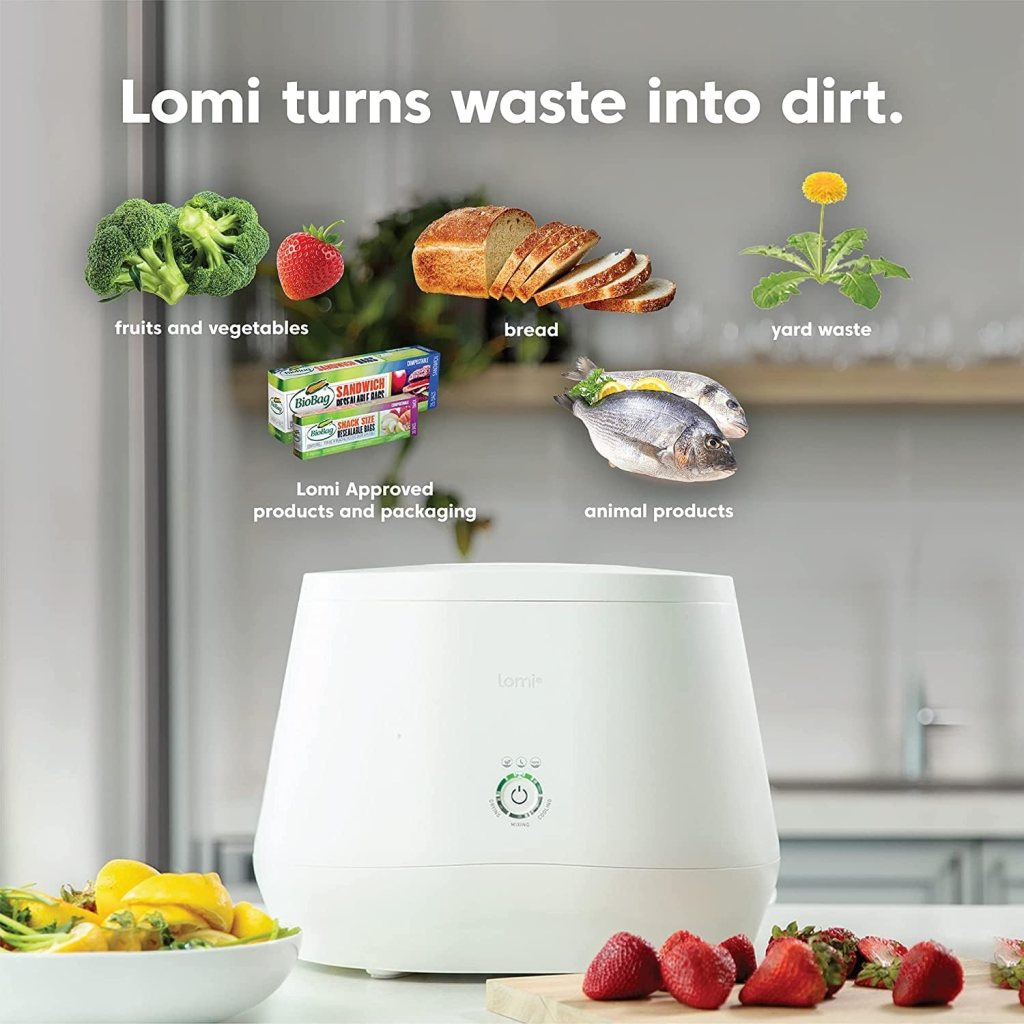
- PROS: Keeps food out of the waste stream. Breaks down food waste into a small size that can be added to a compost pile or used as nutrients in the garden.
- CONS: Expensive. Does not actually compost. Uses electricity which may mean higher utility bills. Has mechanical parts that will wear out over time.
- MATERIALS NEEDED: A countertop kitchen composter, 120 volts AC electric outlet
- BUILD TIME: n/a
- DIY SCALE: n/a
- TIME TO USABLE “COMPOST”: 8 hours but really this is not applicable since this machine does not make true compost
- HANDS-ON HOURS PER WEEK: 1 hour
- COST (new): $500
- Here is an example
That’s it for our comparisons! Let us know if there are any additional compost systems that you would like us to research. Before we wrap this up, we wanted to offer a quick word on compost tea and what waste products you can add to your compost.
Many articles, blogs, and books talk about compost tea and the importance of using this tea to inoculate the soil with microorganisms. Some folks may confuse this with liquid fertilizer or a foliar spray. This will be a blog post for another time where we will discuss its benefits and drawbacks, and show you how to build a compost tea aerator and what recipe to use to brew the “tea”. For now, we are not including it in this list since it is not a way to make compost, contains very little organic matter or nutrients on its own, and is more a product you can create using some finished compost produced with many of the above methods. Microbes are definitely important and compost tea can be beneficial in some cases, but there is more to the story than we can go into here!
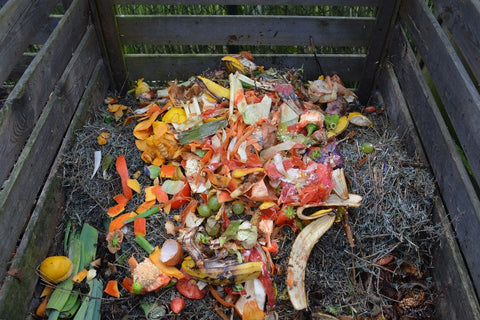
People often wonder what things can be composted. As can be seen in the above list, different methods allow for different amounts of certain items. Things that are generally always safe are grains, fruit and vegetable scraps (foods like garlic, onion, citrus, and hot peppers need to be used more sparingly if at all depending on the system), and organic matter such as shredded paper, mulched leaves, finely chipped wood pieces, hay, straw, grass clippings, coffee grounds, tea leaves, cotton, etc. Only certain methods can handle things like meat and dairy (a biogas digester, hot compost system, bokashi, etc.).
Sometimes the subject of human waste comes up. We will be addressing this in a future blog post as well (what to do with urine and feces), but if you are interested in learning more about it in the meantime, you can read books like Liquid Gold and the Humanure Handbook. Remember that God does not design waste, junk or trash and the outputs of one system are meant to be the input of another in a closed loop (including human waste)! When we stop being grossed out by waste we can start putting it to good (and safe) use in our gardens and homesteads.
Happy Composting! Glory to Jesus Christ!

Leave a comment